

Unicorn cake pops are a delightful and magical treat, Whether you’re planning a birthday party, a themed celebration, or simply want to add a touch of magic to your dessert table, this comprehensive DIY tutorial is for you.
In this guide, you’ll learn how to make these colorful treats step by step, from gathering ingredients and tools to decorating them with charming unicorn details. Get ready to bring some enchantment to your baking!
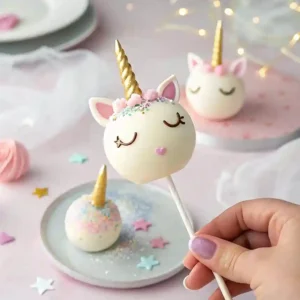
What Are Unicorn Cake Pops?
Unicorn cake pops are delightful bite-sized desserts that combine the fun of traditional cake pops with the enchanting aesthetics of unicorns. With their bright colors, sparkly decorations, and whimsical designs, these treats are the ultimate party dessert idea for both kids and adults. They transform any celebration into a magical experience and make for fantastic social media content.
For even more inspiration on these enchanting treats, check out Bakerella Unicorn Cake Pops, a trusted resource known for its creative dessert recipes.
Why Choose Unicorn Cake Pops for Your Celebration?
Unicorn cake pops are a fun and eye-catching addition to any celebration, from birthdays to baby showers and festive gatherings. Their vibrant colors and whimsical decorations make them a standout dessert, delighting both kids and adults. These treats are also highly customizable, allowing you to match them to any party theme. Plus, their bite-sized nature makes them easy to serve and share, making them a social media favorite!
Essential Tools and Equipment for DIY Unicorn Cake Pops
Before you start, it’s important to gather all the necessary Tools and Equipment. Having everything ready will make the process smoother and ensure your cake pops turn out perfectly every time.
Must-Have Tools and Equipment
Below is a list of essential tools to ensure your unicorn cake pops turn out perfectly:
Baking Essentials
- Baking Pans: For baking your cake base. A standard round or rectangular cake pan works well.
- Mixing Bowls: A set of bowls for mixing ingredients.
- Spoons and Spatulas: For stirring, mixing, and scraping every bit of the cake.
Cake Pop Formation Tools
- Dipping Sticks: Essential for forming the cake pops. You can use lollipop sticks or sturdy skewers.
- Cooling Rack: Allows your cake pops to set properly after baking and dipping.
Melting and Decorating Equipment
- Microwave or Double Boiler: For melting your coating smoothly.
- Piping Bags and Tips: Help in decorating the cake pops with buttercream or icing details.
Additional Helpful Tools
- Food Processor or Fork: To crumble the cake efficiently.
- Measuring Cups and Spoons: Ensure your ingredients are measured accurately.
By ensuring that your kitchen is equipped with these tools, you’ll be well on your way to creating perfect unicorn cake pops that look as delightful as they taste.
Step-by-Step Guide to Creating the Perfect Unicorn Cake Pops
Now, let’s get into the heart of the process. Follow these nine simple steps to create your very own magical cake pops at home. Each step is designed to be straightforward, making it an easy cake pops recipe even for beginners.
Step 1: Baking the Cake Base
The first step is to bake the cake, which serves as the foundation for your cake pops.
Choose Your Cake: Use your favorite cake mix or a homemade recipe. A lighter, fluffier cake works best for creating a moist texture.
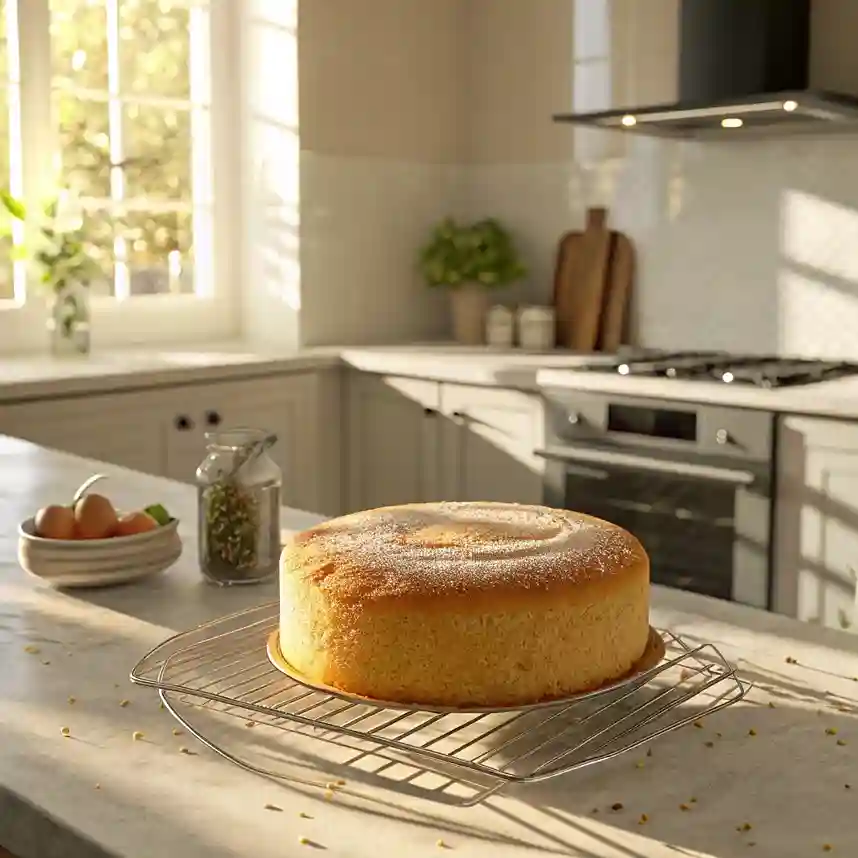
Pro Tip: Consider baking a cake in a smaller pan for a denser, more flavorful base that holds together well when crumbled.
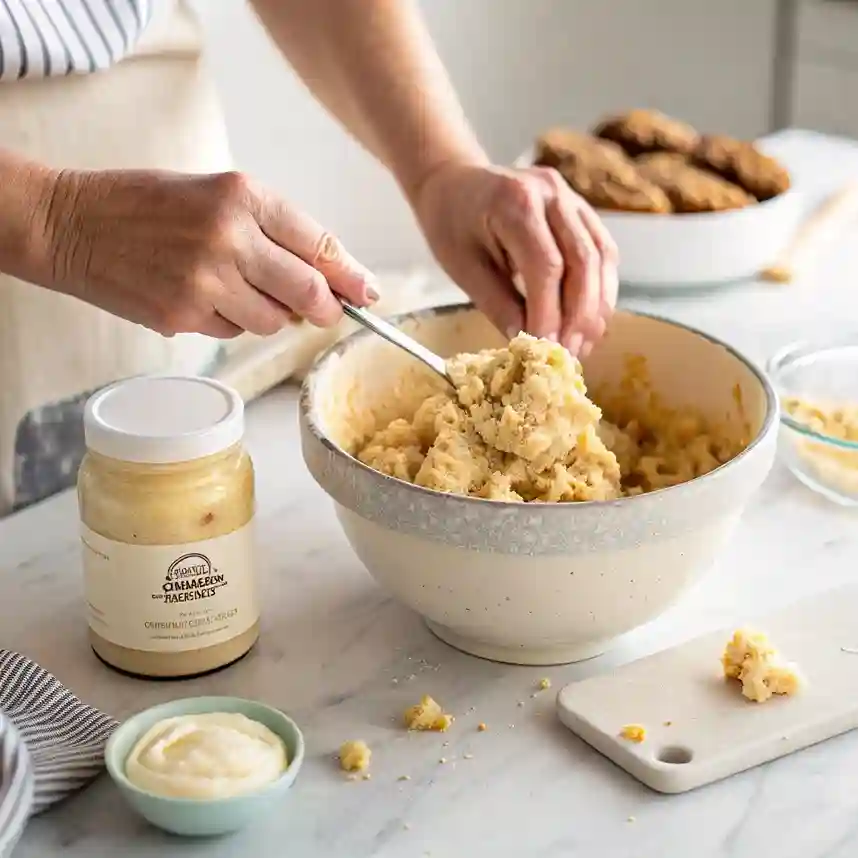
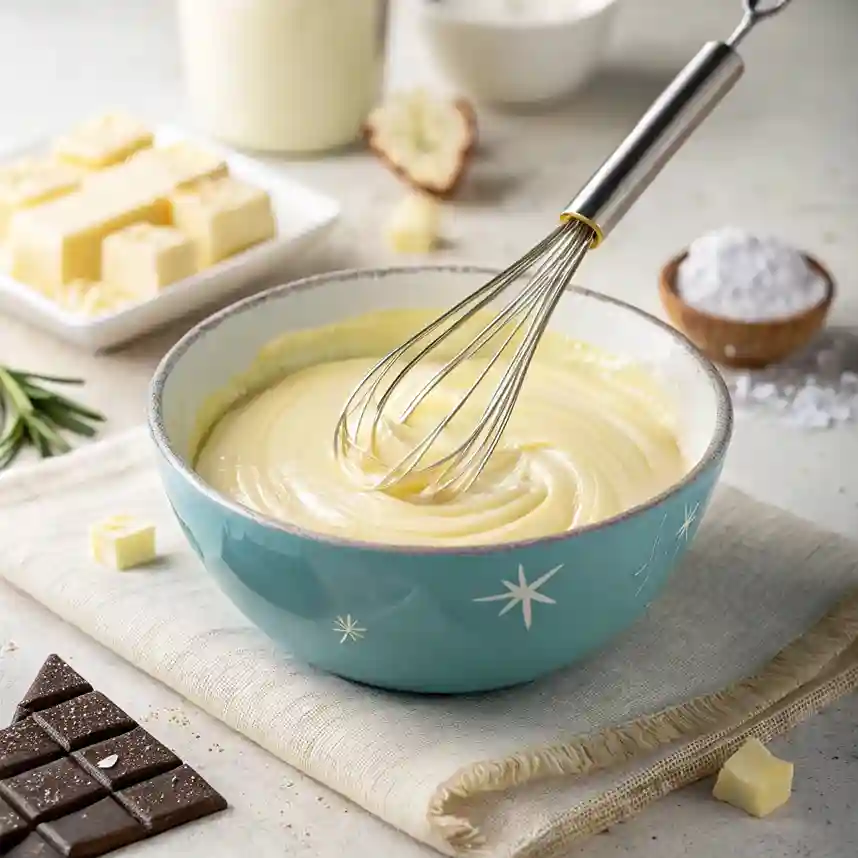
Step 2: Crumbling the Cake and Mixing with Buttercream
With a cooled cake in hand, it’s time to turn it into a moldable mixture.
Crumble the Cake: By using your hands or a food processor break the cake into fine crumbs . The goal is to achieve a uniform, crumbly texture.
Mix in Buttercream: Gradually add buttercream to the cake crumbs. The mixture should be moist enough to hold together without being sticky. Use a spatula to mix thoroughly.
Step 3: Shaping the Cake Mixture into Pops
Shape your cake mixture into uniform balls using a small cookie scoop or your hands, then roll them gently until smooth. Arrange them on a parchment-lined tray for easy transfer to the fridge or freezer before the next step.
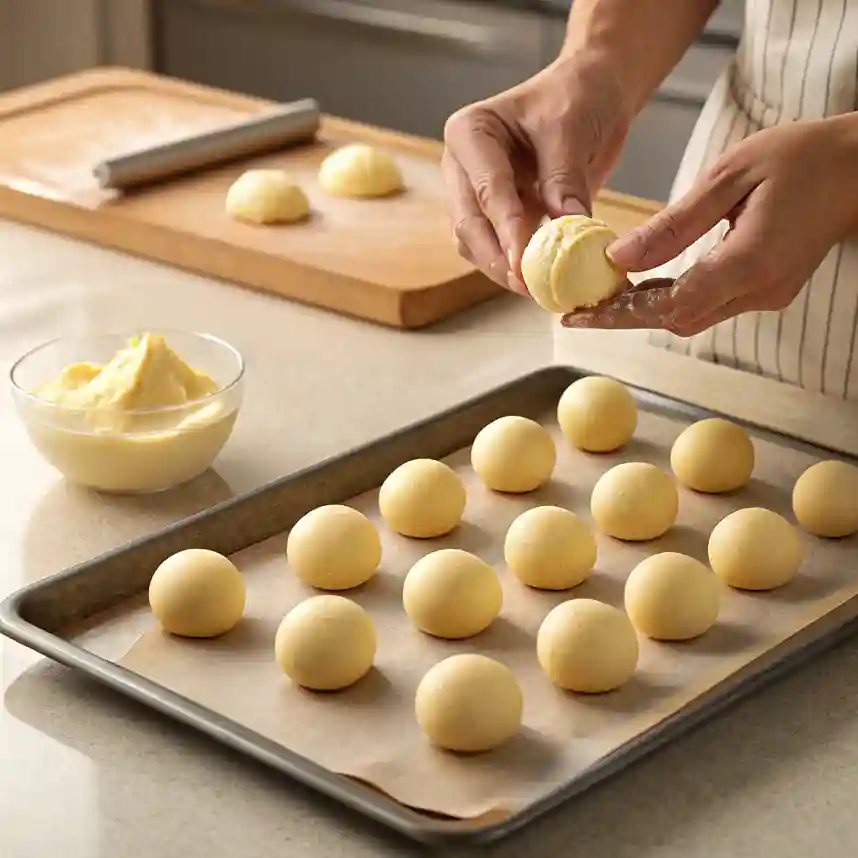
Expert Tip: Wetting your hands slightly can help prevent the mixture from sticking and makes the shaping process easier.
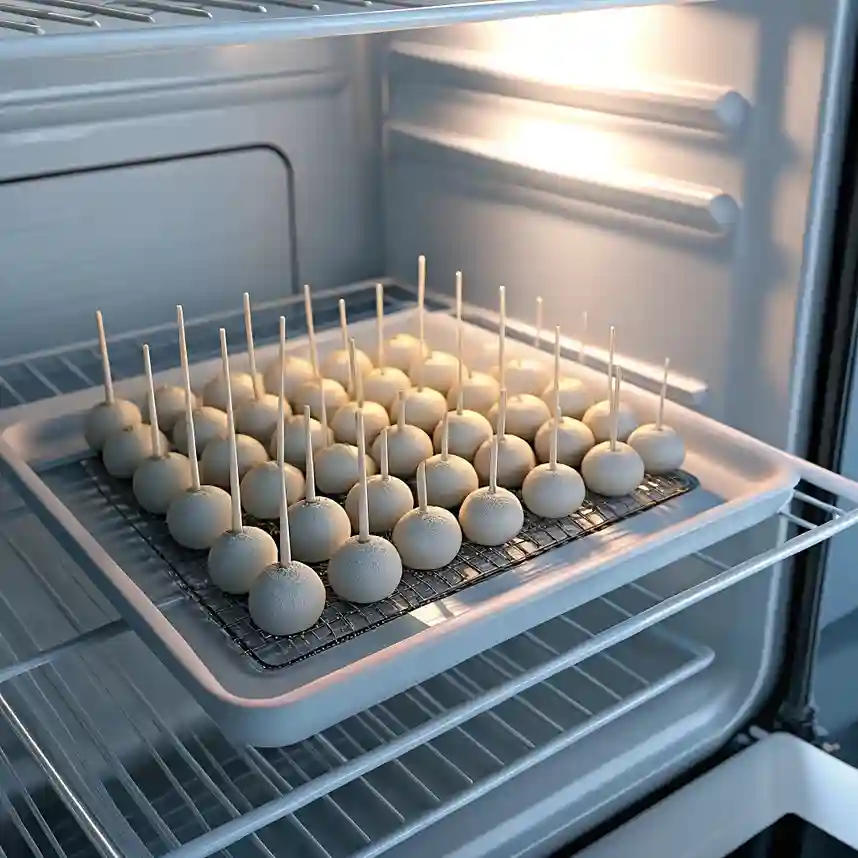
Step 4: Cooling and Setting the Cake Pops
Chill your cake pops in the refrigerator for at least 30 minutes to help them firm up and prevent crumbling during dipping. If you’re short on time, a quick 15–20 minutes in the freezer works too—just avoid freezing them solid. Proper cooling ensures they hold their shape when coated with chocolate or candy melts.
Step 5: Preparing Your Magical Coating
The coating enhances both the flavor and appearance of your unicorn cake pops. Choose from melted chocolate, candy melts, or colored icing—pastel and vibrant shades work best for a unicorn theme. Melt your coating evenly using a microwave or double boiler, stirring frequently to prevent burning. For extra flavor, add a drop of vanilla extract or a pinch of salt.
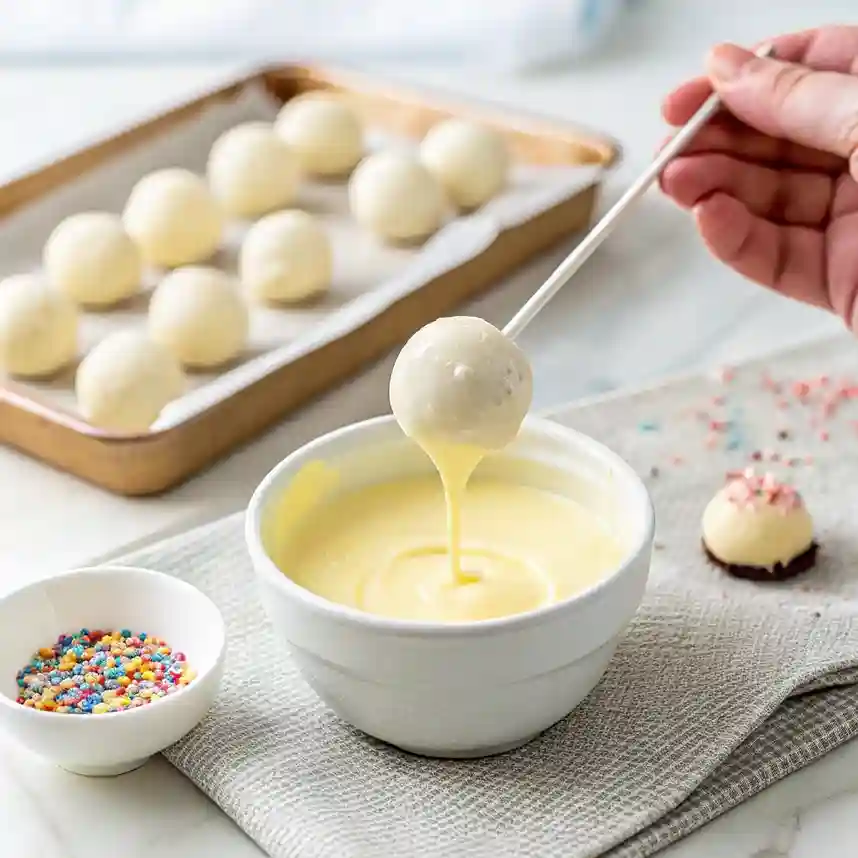
Step 6: Dipping and Coating the Cake Pops
Secure each cake pop by inserting a dipping stick, ensuring it stays in place without distorting the shape. Dip the pops into the melted coating, twirling slightly for even coverage. Let the excess drip off before placing them on a parchment-lined tray. Work in small batches to prevent the coating from hardening too quickly.
Pro Tip: If you’re using a colored coating, consider adding edible glitter or a sprinkle of candy dust immediately after dipping for an extra magical touch.
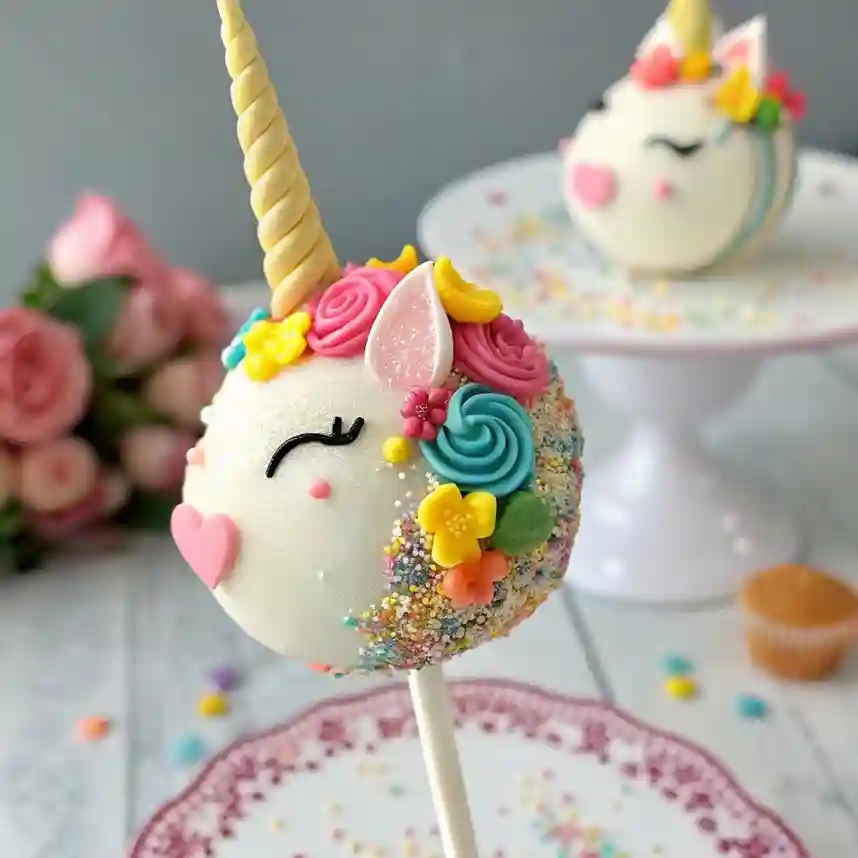
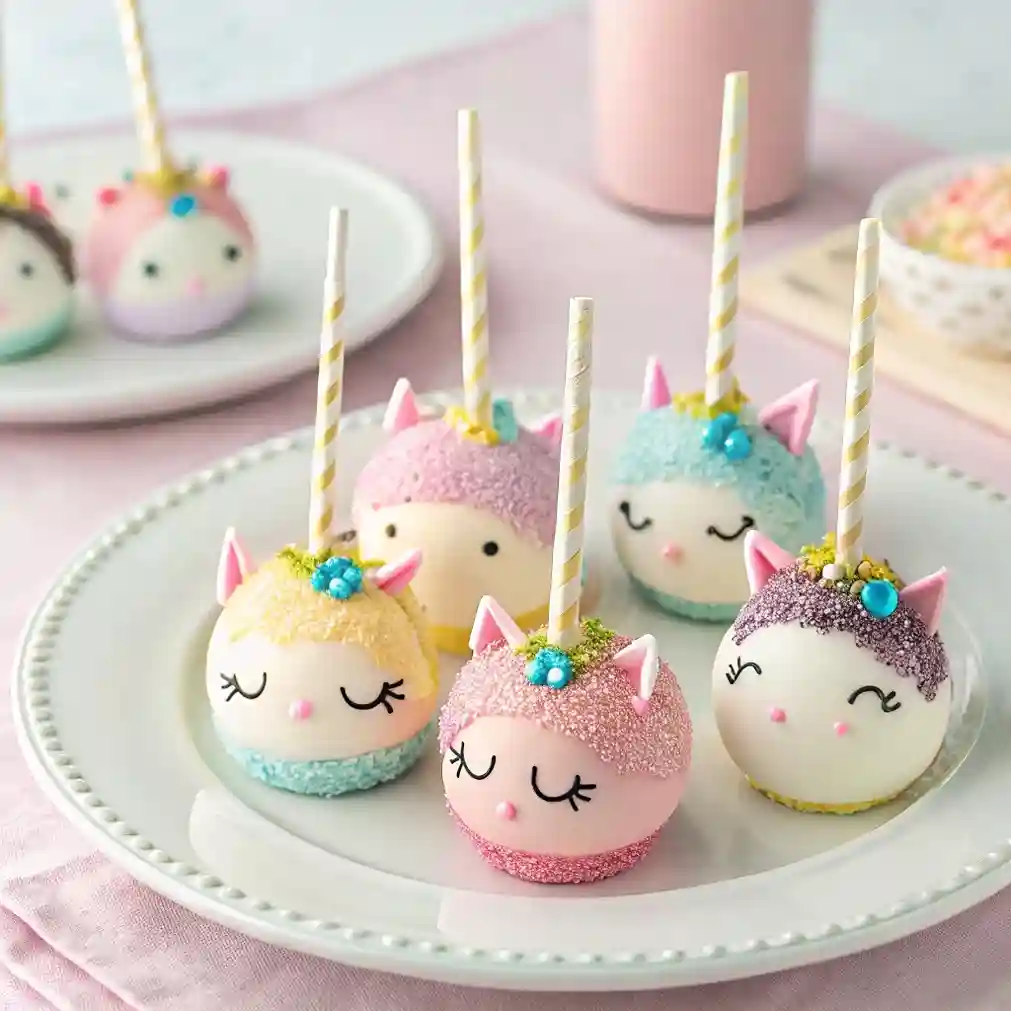
Step 7: Decorating with Fondant, Sprinkles, and Edible Glitter
Now that your cake pops are coated, it’s time to bring them to life! Shape fondant into unicorn horns, ears, and eyes, then attach them using a small dab of icing or water. Add pastel colors, edible glitter, or sprinkles for a magical touch. Let the decorations set completely before serving.
Step 8: Adding the Unicorn Touch: Horns and Ears (Optional)
For a unique touch, shape fondant or colored candy melts into small horns and ears, then carefully attach them with buttercream or icing. Get creative by adding a mane or glittering eyes to make each cake pop a standout mini unicorn!
Design Tip: Not every cake pop needs the full unicorn makeover. You can create a mix—some with elaborate decorations and others with a simpler design—for a fun, eclectic display at your party.
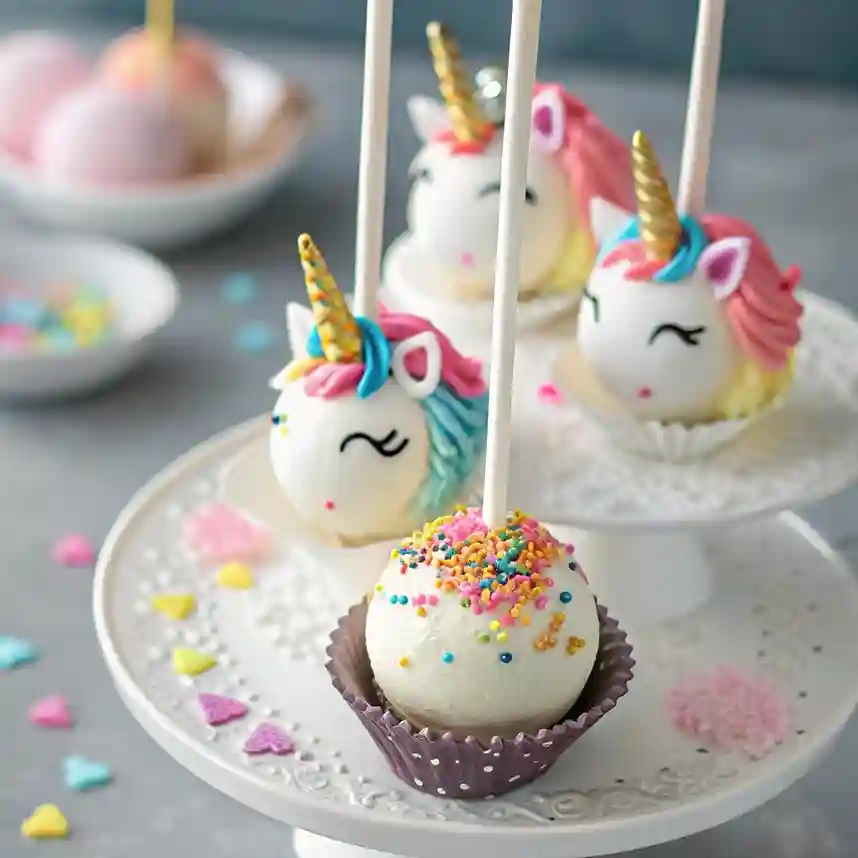
Step 9: Final Presentation and Serving Tips
Elevate your unicorn cake pops with a creative presentation! Arrange them on a themed tray or stand, add extra sprinkles for a magical touch, and serve at room temperature for the best texture. For a fun twist, encourage guests to share their unicorn creations on social media using #UnicornCakePops!
Final Word on Presentation: The way you serve these cake pops can be as magical as the treats themselves. A well-presented dessert not only tastes better but also leaves a lasting impression on your guests.
For even more creative cake pop ideas and decorating techniques, check out Food Network’s inspiring collection at Food Network Cake Pops.
RECIPE CARD :How To Make Unicorne Cake Pops
Unicorn Cake Pops Recipe
Ingredients
For the Cake Pops:
- 1 baked cake your favorite cake mix or homemade recipe; bake in a standard pan for a moist, fluffy texture
- ½ cup buttercream frosting
- 1 teaspoon vanilla extract optional
For the Coating:
- 2 cups melted chocolate candy melts, or colored icing (choose pastel or vibrant shades for a unicorn look)
- 1 tablespoon vegetable oil optional, for a smoother coating
- 1 drop vanilla extract or a pinch of salt to enhance flavor
For Decoration:
- Fondant for shaping unicorn horns, ears, and eyes
- Colorful sprinkles
- Edible glitter
Instructions
Bake the Cake:
- Preheat your oven and bake the cake according to the recipe or box instructions. Allow it to cool completely on a cooling rack.
- Crumble and Mix:
- Using your hands or a food processor, break the cooled cake into fine crumbs. Gradually mix in the buttercream until the mixture is moist and holds together like a dough.
Shape into Balls:
- Use a small cookie scoop or your hands to portion the mixture evenly. Roll each portion into a smooth, round ball and arrange them on a parchment-lined tray.
Chill:
- Refrigerate the cake balls for at least 30 minutes (or freeze for 15–20 minutes) to firm up, ensuring they won’t crumble during dipping.
Prepare the Coating:
- Melt your chosen coating (chocolate, candy melts, or icing) in a microwave or double boiler, stirring frequently. For extra flavor, add a drop of vanilla extract or a pinch of salt.
Dip the Cake Pops:
- Insert a dipping stick into each cake pop. Dip the pops into the melted coating, twirling slightly to ensure even coverage. Allow excess coating to drip off, then place them back on the parchment-lined tray. Work in small batches to avoid premature hardening.
Decorate:
- While the coating is still soft, attach pre-cut fondant shapes (horns, ears, eyes) using a small dab of icing or water. Add colorful sprinkles and a dusting of edible glitter for that magical finish.
Optional Customization:
- For an extra unicorn touch, add additional fondant details like a tiny mane or glittering eyes to create unique, mini unicorn cake pops.
Final Presentation:
- Once fully decorated, arrange your cake pops on a themed tray or stand. For best results, serve them at room temperature and encourage guests to share their creations on social media using #UnicornCakePops.
Notes
Wetting your hands slightly while shaping the cake mixture can prevent sticking and help form perfectly uniform cake pops.
Expert Tips and Tricks for a Successful DIY Experience
Every recipe benefit from a few expert tips even the best of them. Here are some insights to help you avoid common pitfalls and achieve consistent success with your unicorn cake pops.
Avoiding Common Baking Mistakes
- Overbaking the Cake: A dry cake won’t mix well with the buttercream. Always keep an eye on your baking time and use a toothpick test to check for doneness.
- Under-Mixing the Ingredients: If the cake and buttercream aren’t thoroughly combined, you may end up with crumbly or uneven cake pops. Mix slowly and thoroughly until the texture is just right.
- Skipping the Cooling Step: Never rush the cooling process. Cooling the cake and the shaped cake pops ensures they hold together when dipped.
Time-Saving Techniques for Busy Bakers
- Pre-Prep Ingredients: Measure out and set up all ingredients and tools before starting. This “mise en place” technique streamlines the process.
- Batch Processing: Work in batches for steps like dipping and decorating. This keeps your coating from cooling too quickly and allows you to maintain consistency.
- Use Ready-Made Components: If you’re short on time, consider using a pre-made cake mix or store-bought buttercream as a base. This can cut down on preparation time without sacrificing taste.
Adjusting the Recipe for Kids and Special Diets
- Cake Pops Recipe for Kids: For a kid-friendly version, consider reducing the amount of sugar and using naturally flavored extracts. You can also add fun, colorful decorations that appeal to children.
- Healthier Alternatives: Experiment with healthier ingredients such as whole wheat cake mix, reduced-sugar buttercream, or natural food colorings. These tweaks can make your unicorn cake pops a bit more nutritious without compromising on the magical appeal.
- Allergy-Friendly Options: If you’re catering to guests with dietary restrictions, consider using gluten-free or dairy-free ingredients. There are many alternative products available that maintain the quality and flavor of your cake pops.
Frequently Asked Questions (FAQ) About Unicorn Cake Pops
To help you further, here are some frequently asked questions that cover common queries and concerns about making unicorn cake pops.
Absolutely! Many ingredients can be substituted to make a healthier version of your cake pops:
Cake Mix: Look for whole grain or low-sugar options.
Buttercream: You can use Greek yogurt in place of some of the buttercream or opt for a reduced-fat version.
Coatings: Consider dark chocolate, which is often lower in sugar and provides antioxidants. Always test substitutions on a small batch first to ensure the texture and flavor remain balanced.
Properly stored, homemade unicorn cake pops can last:
At Room Temperature: Up to 2 days if kept in an airtight container, although they’re best enjoyed fresh.
In the Refrigerator: Up to a week. However, allow them to sit at room temperature for about 15 minutes before serving to ensure the coating doesn’t become too hard.
Freezing: Cake pops can be frozen for up to 1 month. Before serving Thaw them in the refrigerator overnight
Yes, you can make unicorn cake pops ahead of time! Here are a few tips:
Batch Making: Follow the recipe and store the cake pops in an airtight container in the refrigerator.
Decorating Last Minute: If you’re worried about decorations losing their shine, you can dip the cake pops in the coating ahead of time and decorate just before the event.
Transporting: Use a sturdy container with a soft, non-slip layer to prevent the cake pops from shifting during transport.
Bring the Magic to Life with Homemade Unicorn Cake Pops
Creating the perfect unicorn cake pops doesn’t have to be a daunting task. With this comprehensive guide, you now have all the knowledge you need—from selecting the right ingredients and tools to following a detailed, 9-step process that even beginners can master. These magical treats are not only a feast for the eyes but also a delightful dessert that can elevate any celebration, whether it’s a birthday party, a themed event, or a casual get-together.
Remember, the key to success is in the details: ensuring your cake is moist, your buttercream is perfectly blended, and your decorations add that extra spark of magic. With the expert tips and creative decoration ideas shared here, your unicorn cake pops will undoubtedly become the highlight of your dessert table. So, get creative, have fun, and don’t forget to share your creations on social media using your favorite hashtag. Happy baking!
Related posts:
To help you further on your baking journey, here are some related posts where you can find more inspiration and more details about unicorn cake recipe and design.
Easy Step-by-Step guide | Unicorn cake recipe for beginners
Unicorn Cake Designs: 10 Stunning Ideas You Can Make at Home
Unicorn Cake Supplies – Everything You Need for a Dreamy Cake
Final Thoughts
Unicorn cake pops are more than just a dessert; they’re a celebration of creativity, fun, and the joy of baking. By following this guide and using the right ingredients, tools, and techniques, you’ll be well on your way to creating the perfect unicorn-themed treat that delights both the eyes and the palate.
Whether you’re a seasoned baker or a beginner exploring the world of DIY desserts, these unicorn cake pops are an excellent way to express your creativity and add a touch of magic to any event. From the first bite to the final decorative flourish, each step in this tutorial is designed to ensure your treats are not only delicious but also visually stunning.
Remember to experiment with different colors, textures, and designs to make the recipe your own. Every batch is an opportunity to improve, innovate, and, most importantly, have fun in the process. We hope this detailed guide inspires you to embark on your baking adventure and create some truly magical cake pops unicorn that will wow your friends, family, and social media followers alike.
Happy baking and may your unicorn cake pops bring joy, laughter, and a sprinkle of magic to every celebration!
1 thought on “How to Create the Perfect Unicorn Cake Pops: 9 Simple Steps”